Showing posts with label cake. Show all posts

Thursday, September 10, 2009

the SANGRIA cake.. Ole!!


Well today was finally my day off after working like 10 in a row! I really don't know how I do it, and school work well it keeps me pretty busy. But, finally today I was able to bake! Yippppyyy!
I decided to go with something of my own invention rather than follow a recipe. So, as I browsed the aisles of the nearby grocery store I found a Sangria bottle. Lets make a Sangria cake, I though to myself so here is the result.


The recipe is fairly simple,

12 Tablespoons butter,
1 cup granulated sugar
1 1/3 cups sifted all pourpouse flour
1 teaspoon baking powder
1/2 teaspoon salt
1/2 cup Sangria
1 egg
2 egg whites

Instructions:

Combine butter and sugar and whip until smooth, then add egg beat well.
In another bowl mix salt, powder and flour
then combine dry mix into butter, alternating with Sangria mix.
Finish and Start with flour
Beat until mixed.

In another bowl beat whites until they form stiff peaks, fold into batter.
Put into molds.

Bake in the oven at 350 for about 20 minutes or until the toothpick test comes clean.

The dessert also has a sangria syrup.

it is very simple to make

Ingredients:

2 cups sugar
1 cup water
2/3 cups Sangria

Instructions:

Boil sugar and water to create a simply syrup,
slowly add Sangria, let it reduce, then let it cool before putting on cake

And the apple crisps are also a cute and simple decoration.

Ingredients:

1 apple sliced
1/2 cup grahams crumbs with sugar
butter as needed

Instructions:

Put apples on a baking sheet, coat both sides with crust, butter a little so they wont stick.
Bake until crisp
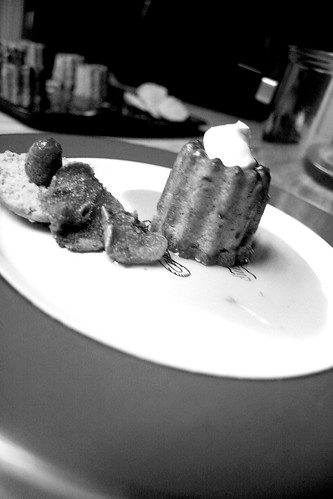
To assemble, Position cake in the center of plate, Add apple crisps on side, pour the syrup on center of cake, letting it drip down to surround the dessert. Top with sour cream. voila!!

Wednesday, October 29, 2008

Vienna in the HOuse!!

So last week I had to do my mid-term report for baking and pastry class. The whole thing was that we were supposed to do an international report on a given country that we picked out of a hat. WOW, I got Austria! Austria? Yeah, Austria and so my research began!!
It was pretty easy to find some history on Austria the hard part was to find food information on Austria because it's such a small place and most of the dessert information was about Apple Streudels!!! Which are so "pasee".
And then there it was a cool historic dessert that belonged only to Austria the SacherTorte.

And here is the recipe!!

Ingredients
200g Excellent Quality Dark Chocolate
1 1/2 Teaspoons Ground Coffee (freshly ground if possible)
6 Eggs (5 separated)
150g Ground Almonds
310g Granulated Sugar
6 Tablespoons Apricot Jam
Icing:
100g Excellent Quality Dark Chocolate
40g Unsalted Butter

Directions
1.Preheat oven to 180c.
Butter and line a 9" Springform Tin.
2.Gently melt the 200g chocolate in a double boiler.
In a large bowl, whisk the 5 egg yolks and remaining whole egg with the sugar until pale and fluffy
In a separate bowl, whisk the egg whites until stiffly peaking.
3. Add molten chocolate to the egg yolk mix and combine well.
4. Gently but firmly fold in the whipped egg whites until throughly combined.
5. Pour into the cake tin and bake for about an hour (it may be done sooner). Halfway through cooking or when the top has set, cover with some foil. This cake burns easily because of the egg whites.
5. When cooked, remove from the oven (the top may crack or sink, again due to the high egg content). Don't worry because you can always do as I did - turn it upside down!
Leave to cool on a rack.
6. Once cool you can begin the icing. Melt the Apricot Jam in a small saucepan over a gentle heat.
7. Unmould the cake, and decide which side up you are going to ice it. Brush over the now liquid Apricot Jam thickly over the top and sides. This is not merely going to help the icing stick but will be an important and surprising layer of the cake.
In a double boiler, melt the 100g chocolate. Once liquified, add the butter and stir until melted. It might look as if it's going to seize up but keep stirring over the gently heat and it will become runny, like double cream.
Pour over the cake, spreading fairly quickly over the top and sides until it is coated all over. With the back of a spoon, make a circular pattern. You can pipe the familiar Sacher moniker on the cake with a little melted chocolate if required.

Wednesday, October 15, 2008

LEMON CURD CAKE


I feel like I have abandoned my precios blog... I haven't. I just have piled up pictures of cakes and food's I've made and take a picture to post them, yet the hours of the day fly away like butterflies if you come near.
And so comes the end of a day, the end of the week, the end of the month. The good news is, it's not yet the end of the month, and second good new is I have like 50 minutes before I leave for work which means I have some catching up to do.
So, last week I had a half day off, and though I had some homework piling up with my cake pictures I decided to grab my apron and do a cake. Me and my mom had already bought all the ingrdients for a lemon curd cake from...yes... the Martha book. I think I have decided I am going to try and do all the cakes in the cake chapter. Just the cakes!!
Well ,the cake was a bit labor intensive, though nothing compared to the Austrain Sacher Torte I made for school, which I will write on later!
Here are the instructions for the lovely Lemon Curd Cake

Ingredients:
1 cup unsalted butter, room temperature
1.5 cups all-pourpose flour
1.5 cups cake flour
1tbs baking powder
.5tsp salt
1 cups sour cream
Grated zest of two lemons
2tbs lemon juice
2 cups sugar
4 large eggs
2 batches lemon curd
1 batch Lemons Swiss Meringue Buttercream

Directions:
Preheat oven to 350, Butter 2 9x2 round cake pans, line with parchment paper, butter parchment paper.
In a bowl sift together, flours, baking powder, sant, set aside.
In a separate bowl combine sour cream and lemon juice/zest
In an electeic mixer combine butter adn sugar for about 5 minutes, scrape, add eggs one at time and beat for 1 minute after each.
Then on low speed ad four mixture alternating with cream. Start and end with flour.
Divide batter into pans, bake for about 30 -35 minutes until tester comes out clean. Let cool on pans, then transfer to cooling racks top sides up.
Using serrated knife, trip tops to even cakes, slice each layer in half, making two layers. Place one on bottom of cake plate, and spread 1/2 cup Lemon Curd over top. Repeat process with remaining layers, do not put curd on top layer.
Crumb coat with meringue and let chill for about 30 minutes.
Using offset spatula spreat entire cake with buttercream. Refrigerate 30 minutes before decorating with lemon curd. Using paper cornet filled with curd, pipe dots to decorate cake. Then pipe vertical lines of differet sizes on sides of cake. It can last refrigerated for up to 3 days.

LEMON CURD
Ingredients:
8 yolks
zest of 2 lemons
1/2 cup fresh lemons juice
1 cups sugar
6 oz unsalted butter,, cut into pieces.

Directions:
Combine yolks, lemon zest, juice, and sugar in heavy bottomed pan, whisk. Cook over medium heat, stirring constabtly with spoon until thick enought to coate a spoon.
Remove from heat. Add salt and butter, one piece at a time, stirring until smoooth. Strain, cover with plastic wrap, refrigerate at least one hour.

LEMON SWISS BUTTER CREAM
Ingredients:
4 egg whites
1.25 cups sugar
1.5 cups butter room temperature
3/4 cup lemon curd

Directions:
In the heatproof bowl of an electric an electric mixer set over saucepan of simmering water, combine egg whites and sugar. Cook whisking constantly, until sugar dissolves.
Attach bowl to mixer, fitter with whisk. Beat eggs on high unti stiff peaks form, Continue beating until fluffly and cool.

Change to paddle, add butter pieces at time, beat well after each addition. With spatula mix in 3/4 cups lemon curd.

Saturday, October 4, 2008

The Homemade Cake


Straightforward and simple, that’s what life should be. And since food is part of that flowing existence we tend to call life, I will present a beautiful recipe. No big story on how I got it, or who made it famous, just good food and a glass of wine!!

Ricotta Cheesecake

Ingredients:
4 cups homemade ricotta cheese (or store bought)
1 cup granulated sugar
1 tsp vanilla extract
1 tsp orange juice
Salt
4 large eggs
Cooking spray
2 cups chopped walnuts, almonds, hazelnuts

Procedure:
Preheat oven to 350F
To prepare cake, place first 5 ingredients in a bowl and beat for 2 minutes on medium.
Add eggs 1 at a time, beating well after each addition. Pour batter in to 10 inch spring form pan coated with cooking spray. Bake at 350F for 1 hour or until cheesecake center barely moves when pan is touched. Remove cake from oven, run blade around edge of cake, remove ring and cover with chopped nuts.
Button crust is optional.
Mine was just ½ cup Ritz, ½ cup Marias , 1 egg, ½ cup butter, mix with hands. Pat on bottom of pan, blind bake for about 5 minutes.

Sunday, September 7, 2008

The Last Class Cake


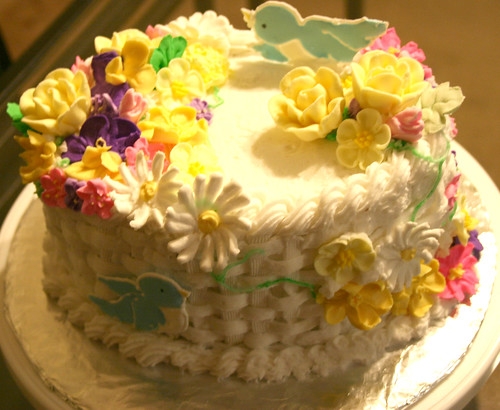
I know, I suddenly stopped writing about the cake decoration classes I was taking at Wilton’s. Well, they were finished at the end of August, the second class! I was very fun and there was way less people than the first one, what an advantage! Every Thursday we leaned flower techniques using Royal Icing, and also Color Flow! We diligently did different types of flower and saved them in long plastic columns called (flower curlers).
The last day we leaned how to do basked weaved with buttercream icing and, to decorate using the sugar flowers we had made the previous weeks.
The end result (in my view) was a beautiful cake that was very hard to eat, because we didn’t want to break it! And though other things got in the way of me, the camera card, and the computer I had to put them up for all to see!!
Sadly school took first place and has to use Thursday night for a Menu class, so cake decorating class 3 will have to wait until December!

Friday, July 18, 2008

italian cream


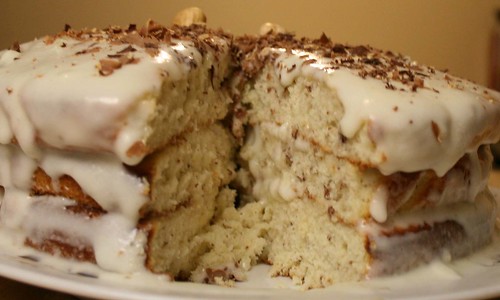
My mom bought me The Best of Cooking Light Cookbook, and then browsed through it.
The fist section I wanted to see was the dessert section. I flipped the pages eagerly, lice a teenage girl flips the pages of a high school yearbook. And then I paused mesmerized by all the fruit pies, the chocolate decadent brownies, the compotes and the ice creams. I had died and gone to heaven...
My mother who is much less in love with the sweet side of food, stopped on page 348. She said (very excitedly) “This seems delicious!”
Let me explain something. My mother does not easily fall completely in love with desserts, she much rather have appetizer than dessert (OMG). So if she said she likes a cake, I usually make it for her. This needless to say, did not become the exception. Sadly, on that day buttermilk did not form part of the many boxes and packages in our fridge.
“Let’s do it later,” I said. And then forgot about it.
She did not. On a solo grocery trip she got the buttermilk.
“I got the buttermilk,” were the welcoming words I hear that afternoon as I got home from work.
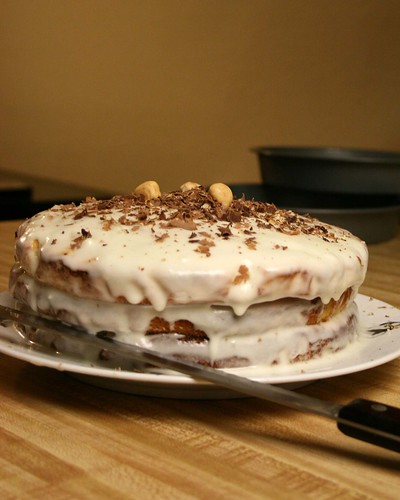
That same day after dinner the picture became reality.
And so you can make it too, here is the recipe.

Italian Cream Cake

Ingredients:

16 oz sugar
4 oz light butter
2 large egg yolks
16 oz all-purpose flour
1tsp baking soda
8 oz buttermilk
1tsp butter extract
1tsp coconut extract
1tsp vanilla extract
6 large egg whites

Cream cheese frosting
4 oz far-free cream cheese
4 oz butter
1tsp grated lemon
1 tsp vanilla
28 oz powdered sugar

Procedure:
1. Pre-heat oven to 350F
2. Coat 3 (9inch) round pans and line bottom with wax paper. Set aside
3. Combine sugar and butter, beat until blended. Add egg yolks (one at a time, beat after each addition.
Lightly spoon flour into dry measuring cups and level. Combine flour and baking soda Add the flour mixture to cream mixture alternately with buttermilk, beginning and ending with the flour mixture. Stir in chopped pecans and extracts.
4. Beat egg whites at high speed mixer using clean, dry beaters until stiff peaks form. Fold eggs into batter and pour batter into prepared pans. Bake at 350F for 23 minutes. Cool in pans 5 minutes on rack. Peel off wax paper, cool.
(CREAM CHEESE FROSTING)
5. Beat first four ingredients in frosting at medium speed of a mixer until smooth. Spoon sugar into measuring cup, and level with knife. Gradually add sugar to butter mixture and beat at low speed until blended.
6. Place 1 cake layer on a plate. Spread 2/3 cup Cream Cheese Frosting and top with another cake layer. Repeat using 2/3 frosting and end with last cake layer. Spread remaining frosting over sides and top.

And to be fair to cooking light here is the serving info:
1 slice; Calories 290, protein 4.1g, carb 52.3 fiber .5g. Cholesterol 37mg, iron .8mg, sodium 172mg. calcium 38mg.

Tuesday, May 20, 2008

White Brownies and Final Grades

So, I am finally and officially done with school. True finals are hectic times; studying, final projects, computer, all-nighters and all the things usually associated to college go for culinary school. Yet, one of the different things is the “lab” finals. Last week I posted about my banquet operations final, and the themed table I set up.
I didn’t write about the basic cooking final on Monday. That made me very nervous, but it was super fun! I made grilled pork chops with red pepper –tomato Coulis, Parmesan Fennel, and corn bread. The chef gave us 3 hours to do our presentation; the ingredients were bought by us, supposedly a $10 budget (mine seemed to border on the $40 budget.) I got everything done in record time, the chef loved my written presentation, and on the actual lab I got a 97! I was very proud!!
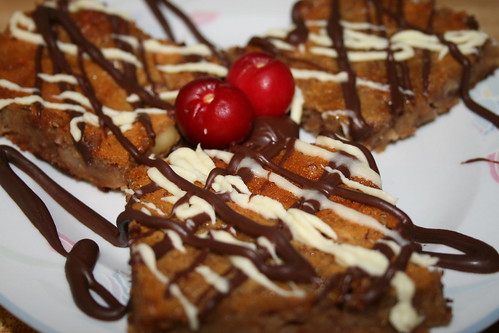
For my hospitality final I did a Power Point and to top it off I baked luscious brownies, based on bean paste and honey. After all natural is better!!


Here is the recipe, which by the way got lots of good comments, from my culinary friends!!

White Bean Brownies
Source: 101 Cookbooks
Modified: Aracely Cardona

Ingredients:
4 ounces bitter chocolate
8oz unsalted butter
16oz canned white beans
8oz walnuts, chopped
.5fl oz vanilla extract
2 fl oz instant coffee
¼ tsp salt
4 large eggs
12oz honey

Procedure:
1. Preheat the oven to 325°F. Line an 11- by 18-inch (rimmed) baking pan with parchment paper and lightly oil with canola oil spray.
2. Melt the chocolate and butter in a glass bowl in the microwave for 1 1/2 to 2 minutes on high. Stir with a spoon to melt the chocolate completely. Place the beans, 1/2 cup of the walnuts, the vanilla extract, and a couple of spoonfuls of the melted chocolate mixture into the bowl of a food processor. Blend about 2 minutes, or until smooth. The batter should be thick and the beans smooth. Set aside.
3. In a large bowl, mix together the remaining 1/2 cup walnuts, remaining melted chocolate mixture, coffee substitute, and salt. Mix well and set aside.
4. In another bowl, with an electric mixer beat the eggs until light and creamy, about 1 minute. Add the honey and beat well. Set aside.
5. Add the bean/chocolate mixture to the coffee/chocolate mixture. Stir until blended well. Add the egg mixture, reserving about 1/2 cup. Mix well.
6. Pour the batter into the prepared pan. Using an electric mixer beat the remaining 1/2 cup egg mixture until light and fluffy. Drizzle over the brownie batter. Use a wooden toothpick to pull the egg mixture through the batter, creating a marbled effect.
7. Bake for 30 to 40 minutes, until the brownies are set. Let cool in the pan completely before cutting into squares. (They will be soft until refrigerated.)


Yield: 12-14 Servings

Friday, April 18, 2008

Chocolate Cake Updated

This week has really been hectic. My family arrived on Wednesday, and it took a day for them to unpack, settle and get use to the time change!!
I am also working on a recipe book for my Basic Cooking Class, its due in a week and must contain 100 recipes, plus procedures and techniques. It's kind of exhausting but I'm having fun. Some are mine, some are borrowed, and all are delicious.

I have also decided to include my Tipsy Chocolate Treat (the cake I made for my Grandma). I am proud to say everyone liked it!! It was my first "professionally decorated cake", and it tasted SINFUL on the inside.

Sadly I didn't take a picture of the one I made, but I have included the book picture, my looked pretty similar but the white chocolate was a little thicker.


The rum gives it a really grown up taste and the piped ganache makes it luscious.
It is a great looking cake, and easier to decorate than it looks!!


Ingredients:
9 squares bitter chocolate
6oz butter
6 eggs
8 oz confectioners’ sugar
4 oz self-rising flour
2 fl oz rum

For decorations:
8 squares bitter chocolate
4 oz whipping cream
4 oz butter (softened)
3 squares white chocolate
3 squares milk chocolate

Procedure:
1. Pre-heat oven to 325F. Line and grease a deep 8in round bottomed pan.
2. Melt chocolate and butter in a microwave for 30-50 seconds at a time.
3. Whisk the egg yolks with ¾ cup sugar until pale, thick and creamy. Gently stir in the cooled chocolate. Then fold in the flour.
4. In a separate bowl, whisk the egg whites until stiff but not dry. Then gently whisk in the rest of sugar. Fold whites into chocolate mixture and spoon into prepared pan.
5. Bake for 1 hour 15 minutes, until cake is well risen and springy to the touch. A knife should come out clean. Leave in pan to cool, then turn into wire rack and finish cooling.
6. Invert cake and sprinkle rum over its base. Allow to soak, turn cake right way up on the rack.
7. Prepare chocolate ganache: Heat cream in a small saucepan until almost boiling, pour over chocolate stirring until chocolate has melted and blended. While still warm, work in butter.
8. Reserve 1/3 of ganache, pour rest over cake. Make sure all cake is fallen and save the drips for later.

9. Cut a piece of foil and mark a rectangle about 10 x 13 in on it. Have a rolling pin, ready. Melt the white and bitter chocolate separately and spoon into piping bags. Drizzle white chocolate in lines across top of cake.
10. Drizzle the bitter chocolate on the foil first, then the white chocolate, keeping within market rectangle. Reserve the unused chocolate. Carefully drape the foil over pin and leave to set. When firm carefully remove pieces of the drizzled chocolate semi-circles and arrange on top of cake.
11. Transfer the cake to serving plate. Re-melt the remaining ganache and chocolate together and allow to cool until thick enough to pipe. Then pipe around the base of the cake. Keep in cool place until ready to serve.

Tuesday, March 25, 2008

My first post

pudding


About a month ago, bored on my day off and with no one at home I ventured into the world of bread puddings. But, where do I start, how do I make one? Well, I took out the faded and batted recipe book my grandmother gave me on me latest trip to Mexico City. I browsed through the appetizer section, the fish and meat section, and them I got to the dessert.I decided to try the coconut pudding; it seemed to be what I was looking for. The type my mother had always talked about made with day old bread soaked in milk. So I followed the recipe, added a little of my own creativity and waited patiently by the oven as the clocked ticked away. I opened it once or twice more than necessary to check on it. Then the moment arrived! I flipped it over on serving tray and voila! It was beautiful!! I leaped with joy... really... I did leap with joy!So, here is the recipe of my joy leaping pudding!


75 grams unsalted butter
4 -6 teaspoons Splenda
6 eggs
1 can of coconut milk
3/4 cup of milk
90 grams day-old bread

Mix the coconut milk and milk together
Pour over bread and let soak for 30 minutes
Then mix the remaining ingredients together
Pre-heat oven at 300F
Pour in a buttered oven mold
Bake in water bath for about 40 minutes or until set.
(The secret for a great tasting pudding is to add different types of bread. For example the first one I did I added vanilla cookies, some Mexican cinnamon rolls, and baguettes. For the second one I added wafers, white party cake, and multigrain sliced bread. The types of bread add different flavors and make it truly unique.)