Showing posts with label chocolate. Show all posts

Wednesday, October 29, 2008

Vienna in the HOuse!!

So last week I had to do my mid-term report for baking and pastry class. The whole thing was that we were supposed to do an international report on a given country that we picked out of a hat. WOW, I got Austria! Austria? Yeah, Austria and so my research began!!
It was pretty easy to find some history on Austria the hard part was to find food information on Austria because it's such a small place and most of the dessert information was about Apple Streudels!!! Which are so "pasee".
And then there it was a cool historic dessert that belonged only to Austria the SacherTorte.

And here is the recipe!!

Ingredients
200g Excellent Quality Dark Chocolate
1 1/2 Teaspoons Ground Coffee (freshly ground if possible)
6 Eggs (5 separated)
150g Ground Almonds
310g Granulated Sugar
6 Tablespoons Apricot Jam
Icing:
100g Excellent Quality Dark Chocolate
40g Unsalted Butter

Directions
1.Preheat oven to 180c.
Butter and line a 9" Springform Tin.
2.Gently melt the 200g chocolate in a double boiler.
In a large bowl, whisk the 5 egg yolks and remaining whole egg with the sugar until pale and fluffy
In a separate bowl, whisk the egg whites until stiffly peaking.
3. Add molten chocolate to the egg yolk mix and combine well.
4. Gently but firmly fold in the whipped egg whites until throughly combined.
5. Pour into the cake tin and bake for about an hour (it may be done sooner). Halfway through cooking or when the top has set, cover with some foil. This cake burns easily because of the egg whites.
5. When cooked, remove from the oven (the top may crack or sink, again due to the high egg content). Don't worry because you can always do as I did - turn it upside down!
Leave to cool on a rack.
6. Once cool you can begin the icing. Melt the Apricot Jam in a small saucepan over a gentle heat.
7. Unmould the cake, and decide which side up you are going to ice it. Brush over the now liquid Apricot Jam thickly over the top and sides. This is not merely going to help the icing stick but will be an important and surprising layer of the cake.
In a double boiler, melt the 100g chocolate. Once liquified, add the butter and stir until melted. It might look as if it's going to seize up but keep stirring over the gently heat and it will become runny, like double cream.
Pour over the cake, spreading fairly quickly over the top and sides until it is coated all over. With the back of a spoon, make a circular pattern. You can pipe the familiar Sacher moniker on the cake with a little melted chocolate if required.

Tuesday, August 19, 2008

School and some thoughts!

School season officially started this Monday. I have been stressing out over, classes, schedules, and job commitments and of course all the money costs related to school, especially culinary school. F Y I there is lab fees, tools, uniform, etc.
Did I also mention that I joined a gym, have been job hunting, and recently started going to a church group, try fitting that around friends, family and some free time… there is just not enough hours in a day!!
But, alas I have made some free time to post in my lovely blog and describe to you how my days are going so far... yesterday I had my internship class, super fun just introductions and some basic instructions. Today, Quantity took the spotlight… here they’ll teach us about food manufacturing and portioning. Tomorrow (I’m very exited) it’s Baking and Pastry, and Thursday, I’ll have International Food, here we prepare food for actual customers! And at night I have Menu/Layout.
So, you can all feel pity for me at my busy schedule I have three classes at another college that include Small Business, Marketing, and ServSafe Foods. 24 units in total…
And to celebrate all this, I need to share to home recipes that can’t be made in a commercial kitchen; because the crock-pot is not commercial.
Bon Appetit!

Cran-Apple Risotto

Ingredients
1/4 cup butter
3 little apples (diced)
½ dried cranberries
1 1/2 t cinnamon
1/8 t nutmeg
1/4 t kosher salt
1 1/2 cups Arborio rice
4 tbsp Splenda
4 cups rice milk

Procedure
Use a 4 qt round crock-pot
Set the crock to high and add the butter, let it melt
Add the rice to the butter, and stir it around to coat it.
Add the apples, and spices. Stir in the rice milk
Let it cook on high for 3-5 hours or on low for 6 or so.

Banana- Chocolate Pudding

Ingredients:
1 ¾ cup self rising flour
6tbsp butter
2 ripe bananas
6tbsp caster sugar
1 ¼ cups milk
1 egg (beaten)
2/3 cup chocolate chips

Procedure:
1. Grease and line the base of a 4 cup pudding basin
Put an inverted saucer in this bottom of the ceramic pot and pour 1 inch of hot water. Turn on to high.
2. Sift flour into a large mixing bowl, and rub in butter until the mixture resembles breadcrumbs. In a separate place mash bananas, then stir into the flour and butter mixture. Add the sugar and mix.
3. In a clean bowl, add the milk and eggs, then beat into the banana chopped chocolate and spoon in to the prepare pudding basin. Cover with a double thickness of buttered foil and place in the ceramic cooking pot. Pour enough boiling water around the basin to come just over half up the sides.
4. Cover the pot, cook for 3-4 hours, or until the pudding is risen and toothpick inserted comes out clean.

Wednesday, June 18, 2008

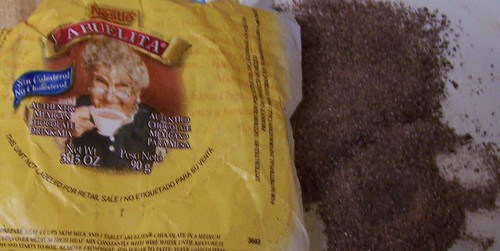
Three Things To Do with Mexican Chocolate

Okay I’m back from a wonderful trip to Solvang, California. Unforgettable!! But I’ll post on that later, once I edit my pictures… Today I’ll post about a couple of things I did before leaving… all three with Mexican Chocolate.
It has a certain spice to it, which gives it …that… Mexican taste!!

The first were these delicious Shortbread Cookies. The recipe itself came from The Cookie and Biscuit Bible” (Hermes House Press). The decorations however came from me, using a mix of Mexican chocolate and butter, and piped to made designs.

Mexican chocolate cookies!!

Ingredients:
8 oz butter softened
4 oz confectioner’s sugar
1tbsp vanilla extract
11 oz all purpose flour
Salt
5 oz pecans (finely chopped)

3oz Mexican chocolate
4-6 oz butter

Procedure:
1. Preheat oven to 375F. Beat butter until fluffy; add 4oz sugar and vanilla.
2. Gradually add the flour and salt to mixture beating after each addition. Until dough is formed.
3. Add chopped pecans and knead until combined.
4. Roll dough out to about 1/3 inch and cut with cookie cutters of your choice
5. Bake for 10-15 minutes and let cool for 10 minutes, then using spatula transfer to finish cooling.
6. Melt chocolate and butter in microwave; pour into piping bag and decorate!

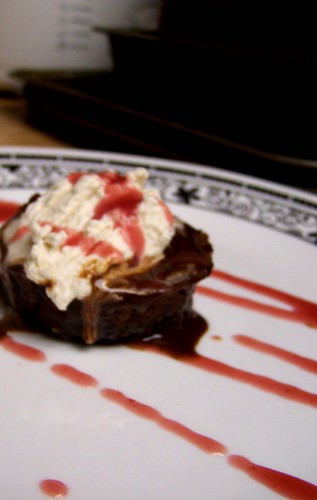
Second thing I made is this cute lava cakes. They are fun to make!!

Mexican Chocolate Cakes

Ingredients:
16 oz heavy cream
11 oz Mexican chocolate (chopped)
3 tsp cinnamon
3 eggs
3 egg yolks
4 oz sugar
4 oz cake flour, sifted
¼ once Mexican chocolate grated
4 oz confectioner’s sugar
2 tbsp vanilla extract

Procedure:

1. In a heavy bottomed stainless steel saucepan bring 12 oz cream to boil over medium heat. Stir in 6 oz Mexican chocolate and 1 tsp cinnamon and blend well until melted. Chill the mixture until firm.
2. Preheat oven to 375F. Butter 12 (4 oz) ramekins, completely coating the sides. In a heavy bottomed saucepan, melt the butter and 5 oz chocolate and stir until melted. Set aside. Whip the eggs, egg yolks and sugar with a mixer until they are a light lemon color and tripled in volume. With a rubber spatula, carefully fold in flour and chocolate-butter mixture. Whip with mixer on medium speed until glossy. With a spatula, fold in the grated chocolate and vanilla extract.
3. Transfer the cake batter to a pastry bag with no tip. Using the pastry bag fill the ramekins ¾ full. With a small spoon, place a small portion of the prepared ganache into the center of each filled ramekin. Bake the cakes for approximately 8 – 10 minute. The cakes should be firm around the edges and pull away from the sides. The finished cakes are firm on the outside but soft on the inside.
4. Whip the heavy cream until firm; add confectioner’s sugar and vanilla extract. Serve cakes immediately.

And finally a non- baked treat. Gooey chocolate “truffles” Yes, I watched Food Network the other day and saw Good Eats, they made truffles.

So, I decided to try some, the chocolate didn’t set really… (Trying to figure out why?), But, I proceeded in coating the result and made tasty delicious treats!!

Mexican “Truffles”

Ingredients:

6 oz heavy cream
3 oz Mexican chocolate (chopped)
4 oz dark chocolate
4 oz butter

Coating of your choice (I used chopped almonds, shredded dried mango, and cocoa and espresso powder.)

Procedure:

1. Bring heavy cream to a boil, add Mexican chocolate. Let cool.
2. Melt chocolate and butter in a separate bowl. Mix with Mexican chocolate spread on a tray lined with parchment paper and let firm in the refrigerator.
3. About 1 hour later, scoop chocolate mixture, form into “balls” (It wont firm really well so don’t worry if they don’t come out perfect)
4. Let cool again for about 30 minutes, then scoop again, and put in desired coating. Enjoy!

I hope you try them all, or at lest one. And if you simply need hot chocolate, grab a gallon of 2% milk, heat and add one tablet of Mexican chocolate. Heat till dissolved. Fiesta time!

Friday, April 18, 2008

Chocolate Cake Updated

This week has really been hectic. My family arrived on Wednesday, and it took a day for them to unpack, settle and get use to the time change!!
I am also working on a recipe book for my Basic Cooking Class, its due in a week and must contain 100 recipes, plus procedures and techniques. It's kind of exhausting but I'm having fun. Some are mine, some are borrowed, and all are delicious.

I have also decided to include my Tipsy Chocolate Treat (the cake I made for my Grandma). I am proud to say everyone liked it!! It was my first "professionally decorated cake", and it tasted SINFUL on the inside.

Sadly I didn't take a picture of the one I made, but I have included the book picture, my looked pretty similar but the white chocolate was a little thicker.


The rum gives it a really grown up taste and the piped ganache makes it luscious.
It is a great looking cake, and easier to decorate than it looks!!


Ingredients:
9 squares bitter chocolate
6oz butter
6 eggs
8 oz confectioners’ sugar
4 oz self-rising flour
2 fl oz rum

For decorations:
8 squares bitter chocolate
4 oz whipping cream
4 oz butter (softened)
3 squares white chocolate
3 squares milk chocolate

Procedure:
1. Pre-heat oven to 325F. Line and grease a deep 8in round bottomed pan.
2. Melt chocolate and butter in a microwave for 30-50 seconds at a time.
3. Whisk the egg yolks with ¾ cup sugar until pale, thick and creamy. Gently stir in the cooled chocolate. Then fold in the flour.
4. In a separate bowl, whisk the egg whites until stiff but not dry. Then gently whisk in the rest of sugar. Fold whites into chocolate mixture and spoon into prepared pan.
5. Bake for 1 hour 15 minutes, until cake is well risen and springy to the touch. A knife should come out clean. Leave in pan to cool, then turn into wire rack and finish cooling.
6. Invert cake and sprinkle rum over its base. Allow to soak, turn cake right way up on the rack.
7. Prepare chocolate ganache: Heat cream in a small saucepan until almost boiling, pour over chocolate stirring until chocolate has melted and blended. While still warm, work in butter.
8. Reserve 1/3 of ganache, pour rest over cake. Make sure all cake is fallen and save the drips for later.

9. Cut a piece of foil and mark a rectangle about 10 x 13 in on it. Have a rolling pin, ready. Melt the white and bitter chocolate separately and spoon into piping bags. Drizzle white chocolate in lines across top of cake.
10. Drizzle the bitter chocolate on the foil first, then the white chocolate, keeping within market rectangle. Reserve the unused chocolate. Carefully drape the foil over pin and leave to set. When firm carefully remove pieces of the drizzled chocolate semi-circles and arrange on top of cake.
11. Transfer the cake to serving plate. Re-melt the remaining ganache and chocolate together and allow to cool until thick enough to pipe. Then pipe around the base of the cake. Keep in cool place until ready to serve.